Managing Exclusion Windows
Exclusion windows allow administrators to define specific periods when Automox does not run tasks such as patching, policy execution![]() When a policy runs on targeted devices per schedule., required software installation, or worklets
When a policy runs on targeted devices per schedule., required software installation, or worklets![]() Represents an automation script that can execute on a set of devices, consisting of evaluation and remediation code blocks. Worklets can be OS-specific or targeting a platform-agnostic language. on devices
Represents an automation script that can execute on a set of devices, consisting of evaluation and remediation code blocks. Worklets can be OS-specific or targeting a platform-agnostic language. on devices![]() A subset of Assets, a general term denoting anything that runs the Automox Agent and is registered with the system.. By scheduling these controlled pauses, administrators can prevent restarts or other interruptions during critical business hours and maintain predictable maintenance behavior across devices. Each exclusion window includes configuration details such as its name, schedule type, duration, and associated device groups. You can create exclusion windows from the Scheduled Windows page, and edit or delete them from the Exclusion Windows page.
A subset of Assets, a general term denoting anything that runs the Automox Agent and is registered with the system.. By scheduling these controlled pauses, administrators can prevent restarts or other interruptions during critical business hours and maintain predictable maintenance behavior across devices. Each exclusion window includes configuration details such as its name, schedule type, duration, and associated device groups. You can create exclusion windows from the Scheduled Windows page, and edit or delete them from the Exclusion Windows page.
Exclusion windows apply to all policy types: Patch All, Severity, Patch Only, Manual Approval, Patch All Except, Advanced, as well as Worklets and Required Software policies.
Creating an Exclusion Window
You can create an exclusion window to prevent Automox from performing processes during a defined time period.
To create an exclusion window, follow these steps:
- Navigate to Manage → Scheduled Windows.
- Select Create Exclusion Window.
- In the Details section, complete the following fields:
- Exclusion Window Name: Enter a descriptive name for the scheduled window.
- Notes: Enter optional context or details about the purpose of the scheduled window.
- Status: Select Active to enable the scheduled window, or Inactive to save it without applying it.
- In the Groups section, select Associate Groups and assign one or more device groups. Automox does not run tasks on the devices in these groups during the scheduled time.
- In the Schedule section, configure when the exclusion window takes effect:
- Recurring: Select one or more months, occurrences, and days. For example, to create an exclusion window that occurs on the second Monday of June, select June, 2nd, and Mon. This setting applies to the second occurrence of Monday in the month, regardless of the calendar week.
- One time: Specify a start date and time and an end date and time.
- All times are displayed in UTC.
- Under Duration, specify how long the exclusion window lasts. The duration cannot exceed the selected start and end times.
- Review the Device Preview section to confirm which devices are included in the selected groups. You might need to scroll to view this table. See Managing Devices for details of the devices table.
- To save the exclusion window, click Create Exclusion Window.
When an exclusion window is active, Automox prevents affected devices from running tasks during the defined time period.
Editing an Exclusion Window
You can update details, scheduling, or group associations for an existing exclusion window.
To edit an exclusion window:
- Navigate to Manage → Scheduled Windows.
- Select the name of the exclusion window you want to edit.
- Update any necessary fields, such as Status, Groups, or Schedule.
- Save the changes.
Deleting an Exclusion Window
You can remove exclusion windows that are no longer needed.
To delete an exclusion window:
- Navigate to Manage → Scheduled Windows.
- Select the name of the exclusion window you want to delete.
- In the edit window click Delete Window.
- A pop-up window shows any affected devices and their corresponding groups. Review the affected devices and, if you are sure, select Delete Window.
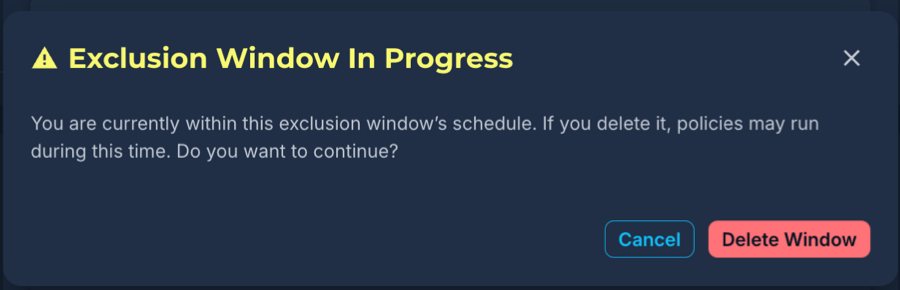
- Another warning window allows you to make a final decision to delete it or not. Select Cancel or Delete Window.
Manual Overrides
You can override an active exclusion window if you have execution permissions. When you manually run a policy, worklet, or required software task during an active window, Automox displays a confirmation dialog warning that the task falls within the exclusion window.
If you continue, the action is logged in both the Activity Log and the Policy Results Report as a manual bypass of the exclusion window.
