Configuring Google SSO for Automox
This document explains how to configure Google SSO for Automox using SAML.
Prerequisites:
- You must be signed in to Google as a Super Administrator for this task.
- You must have the required permissions to enable and configure SAML in Automox. See Understanding Roles and Permissions for details regarding permissions.
Using Google's Pre-Integrated SAML App
The easiest way to configure Google SAML for Automox is to use their pre-integrated app.
- Log into the Google Admin panel as a Super Administrator, and follow the steps given in Step 1 of the linked Google documentation.
- In a separate tab, log into Automox:
- To set up Google, you will need the following:
- Your unique ACS URL.
- Entity ID.
- From the Settings → Security tab in your Automox console
 Our web-based management dashboard, available at https://console.automox.com., click Enable on the SAML The standard for exchanging authentication data between an identity provider and Automox. option.
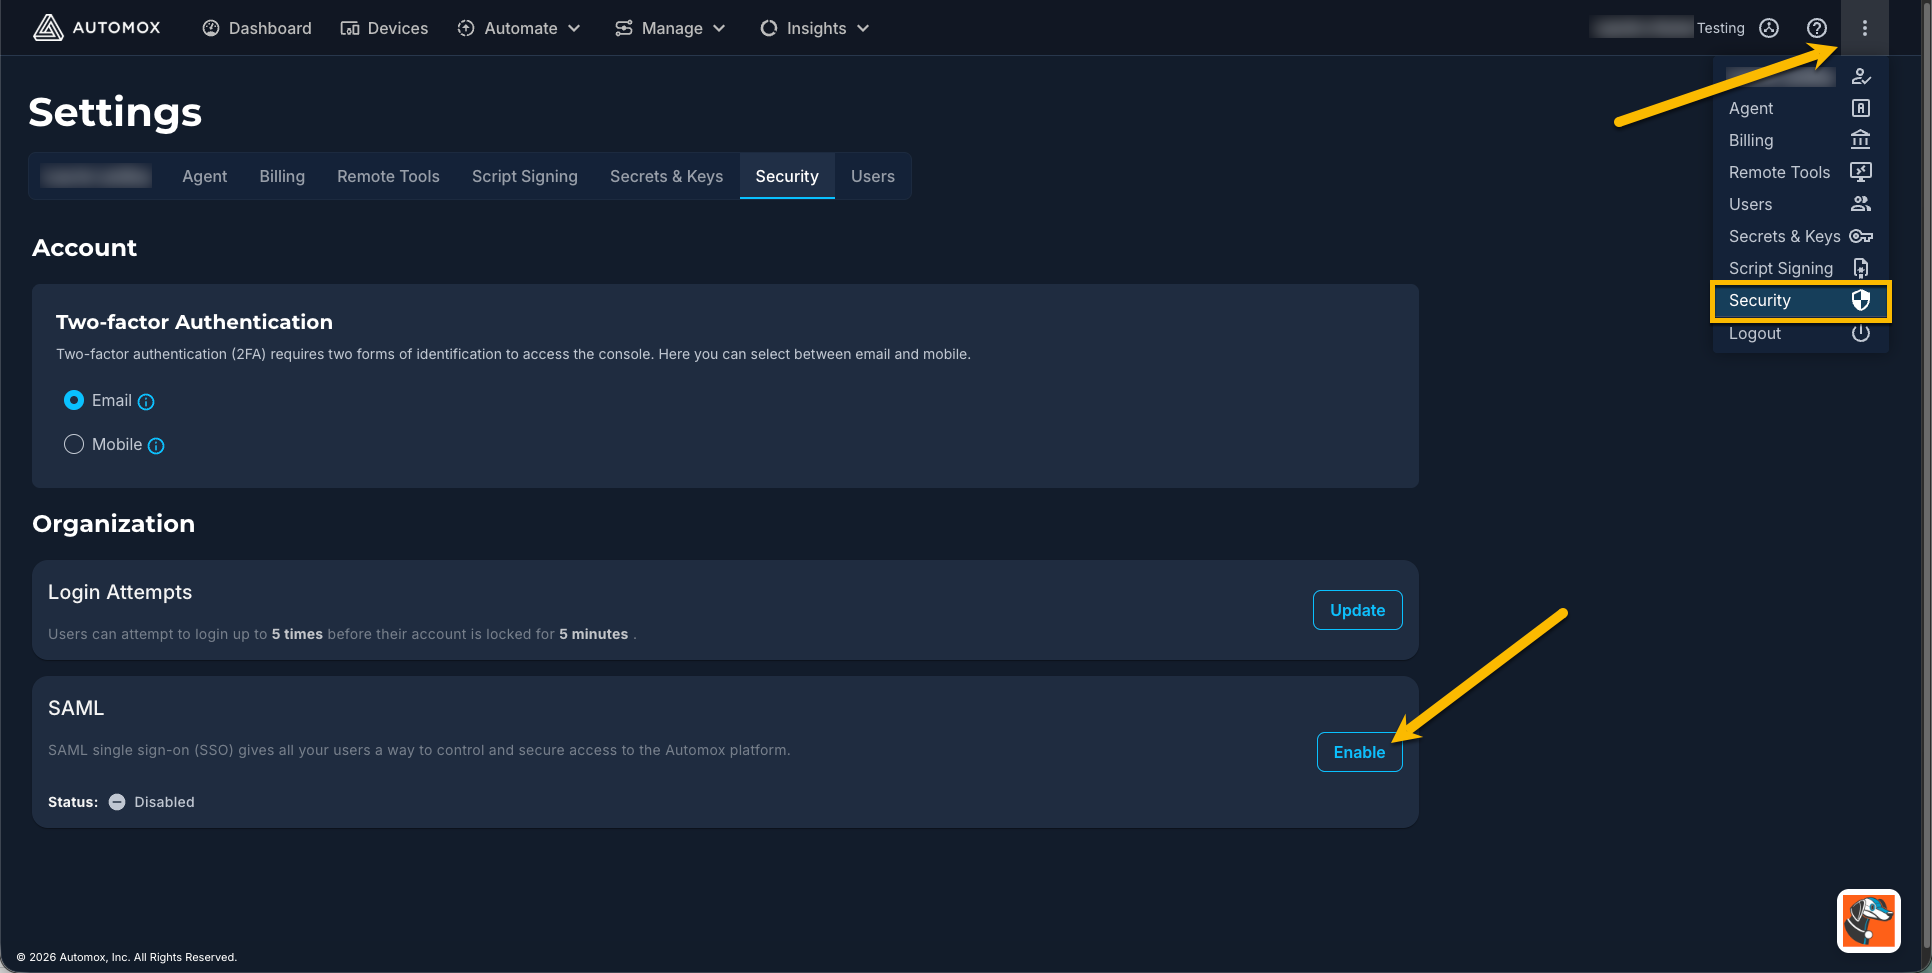
- This loads a window with the required ACS URL and Entity ID.
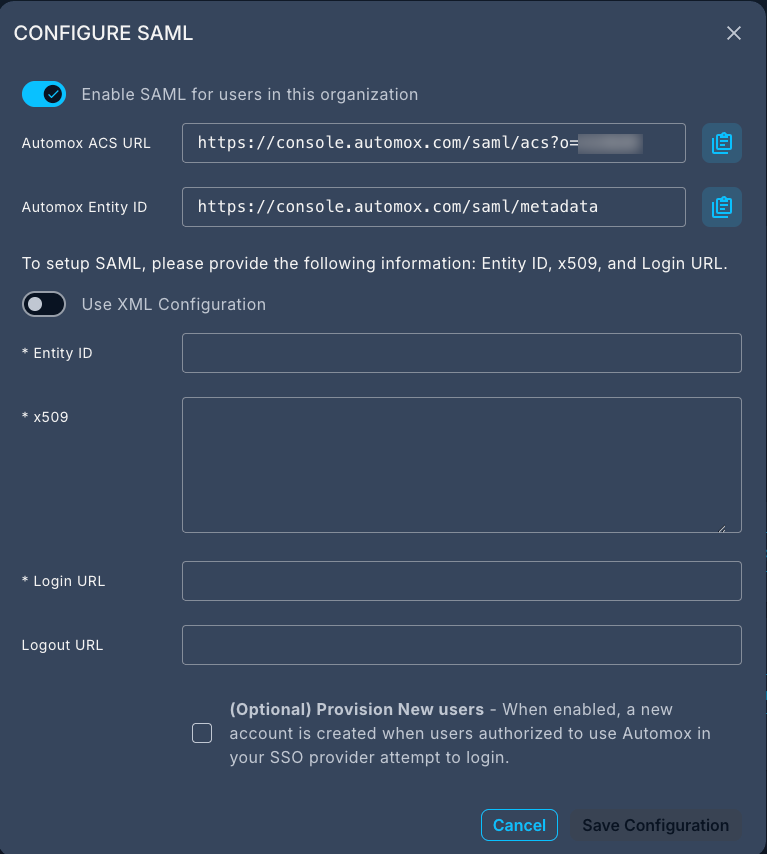
- Copy the Automox ACS URL and Automox Entity ID, and save them. You will need these in the next step.
- Follow the remaining steps in Step 2 of Google's documentation (Set up Automox as a SAML 2.0 service provider).
- Follow the remaining steps of Google's documentation.
- To set up Google, you will need the following:
