Inviting Users When Single Sign-on (SSO) is Enabled
When single sign-on (SSO) is enabled in Automox, the way that users can be invited has changed. Currently, users cannot be invited to an organization with SSO enabled. This is to prevent a password from being set for the new user.
To invite users to an organization with SSO enabled, you must enable Provisioning within Automox's SSO settings. Today, users can only be provisioned when attempting login through IdP (Identity Provider) initiated SSO.
When provisioning users from an IdP, the user is created in Automox as a Read Only user. You must have the required permissions to adjust the role for the newly-created users. This can be done from the Global View, Setup & Configuration page. Refer to Understanding Global Access Management and Roles and Permissions Management.
Here's how to get started:
- Load or create your SSO configuration in Automox on the Settings → Security page.
- If you are configuring SSO for the first time, follow the SAML-based Single Sign-on (SSO) instructions.
- If you already have SSO enabled, and have not enabled Provisioning, simply click the SAML Enable box again until the configuration screen appears.
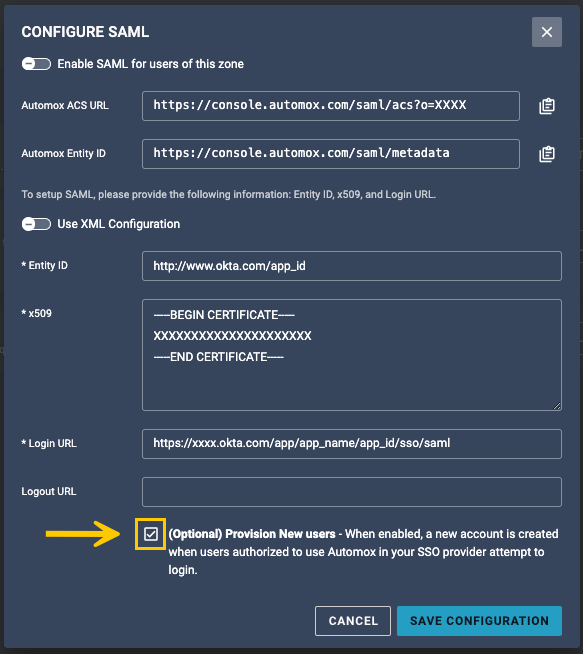
- Select the checkbox for (Optional) Provision New Users.
- Assign users in your Identity Provider to the app or connector.
- As new users attempt login to Automox through your internal Identity dashboard or SSO app listing, they will be issued an Automox license with default permissions.
- Click Save Configuration.
