Deploy the Latest Automox Agent using PowerShell or MSI via Windows GPO Policy
Using a Windows GPO policy, and a PowerShell script or MSI file, you can deploy the Automox Agent in bulk to your Windows devices. You can configure the GPO policy to either run at login, or have it run as a scheduled task.
Prepare Your Installer
Download the Automox Installer PowerShell script directly to your local device or Windows Server. If file transfers from your local device to the server are restricted, run the download process directly on the Windows Server.
The latest file downloads can be found here: Download Links for the Latest Automox Installers or alternatively, you can use the PowerShell script method to download the latest version. If you modified the MSI file to include the access key, you will need to do this again after downloading a newer MSI file.
- Run at Login
- Scheduled Task
Create Your GPO - Run at Login
To create your GPO, you can either use the PowerShell script option, or use the MSI installer.
Option A: PowerShell Script
- Store the script file in a location that is accessible to your target devices. You can use the SYSVOL directory or a network share that is accessible to your device.
- Create a new Group Policy Object (GPO) and add the script to your GPO. The path is Computer Configuration → Policies → Windows Settings → Scripts (Startup/Shutdown)
- From the right pane, double-click Startup.
- In the dialog box, click the PowerShell Scripts tab then click Add....
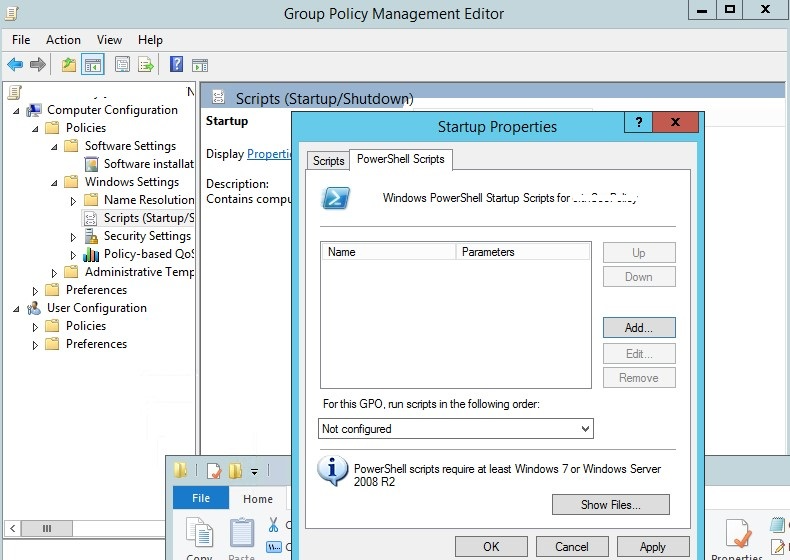
- Click Browse to locate the script file and click Open.
- Edit the following script parameter by adding your Automox access key. Enter the parameter in the Script Parameters field and save the script.
Copy
-AccessKey your-access-key-goes-here - Now that these values are set, you can assign the GPO to your target audience.
On startup, the script checks for the agent. If it's not present, it downloads, installs, and starts the service. If it's already there, it will not take any further action.
Option B: MSI Installer
With a minor modification, you can deploy the Automox Installer MSI using the Software Installation GPO. This method requires that you include your Automox access key as a parameter. Since deployment using this method doesn't allow for command line arguments, you must either create a Transform file (.mst) or modify the installer file to include the access key.
Follow these steps to deploy the installer:
- For details about modifying the MSI file, see Embedding Your Access Key into the Automox MSI.
- After you modify the MSI file, store it in a location that is accessible to your target devices. This requires that you store this in your SYSVOL directory or set up a network share that is accessible to your devices.
- When your file is in the desired location, add the file to your GPO. The path is Computer Configuration → Policies → Software Settings → Software Installation → New → Package...
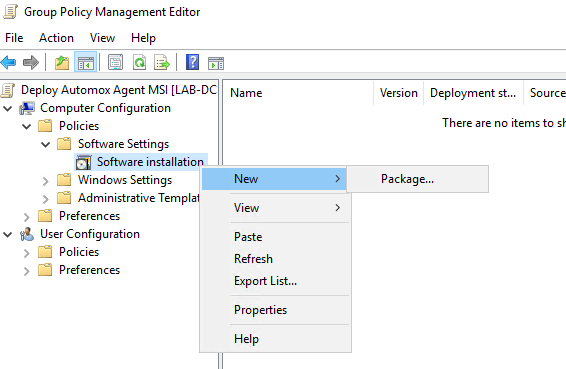
- Browse to and select the modified MSI file and click OK.
- In the next dialog box select Assigned then click OK.
- After you set these values, assign the GPO to your desired audience.
Create Your GPO - Scheduled Task
How to bulk deploy the Automox agent using Windows Group Policy for devices that connect to company networks through a VPN.
Remote computers connecting to company networks through a VPN present a challenge for the most common GPO solutions. Many VPNs do not automatically connect at startup. Due to the way Startup scripts and GPO MSI installations policies are designed, they most likely will fail to apply for remote devices.
Here is an alternative method to use Active Directory GPOs to deploy the Automox agent for your remote users.
The Challenge
We must distribute the file, and then the file must be installed with elevated rights. Preferably, this should be fully automated.
The Solution
Leverage Group Policy preferences to distribute a PowerShell script to each device, and then after it is in place, create a scheduled task to run the installation.
Distribute the File
- Create a new GPO, and open the Group Policy Management Editor.
- Navigate to Computer Configuration → Preferences → Windows Settings → Files
- Right click Files and select New → File
- From the General tab, update the following:
- Source File(s):
\\YOUR_DOMAIN.COM\NETLOGON\Install-AXAgentMSI.ps1 - Destination File:
C:\Windows\Temp\Install-AXAgentMSI.ps1Note: Leave the rest of the General settings as default.
- Source File(s):
- From the Common tab, select the checkbox for Remove this item when it is no longer applied. This will clean up the MSI file when the policy is no longer applied.
- Create a new GPO, and open the Group Policy Management Editor.
- Navigate to Computer Configuration → Preferences → Control Panel Settings → Scheduled Tasks
- Right click Scheduled Tasks and select New → Scheduled Task (Windows 7 or later)
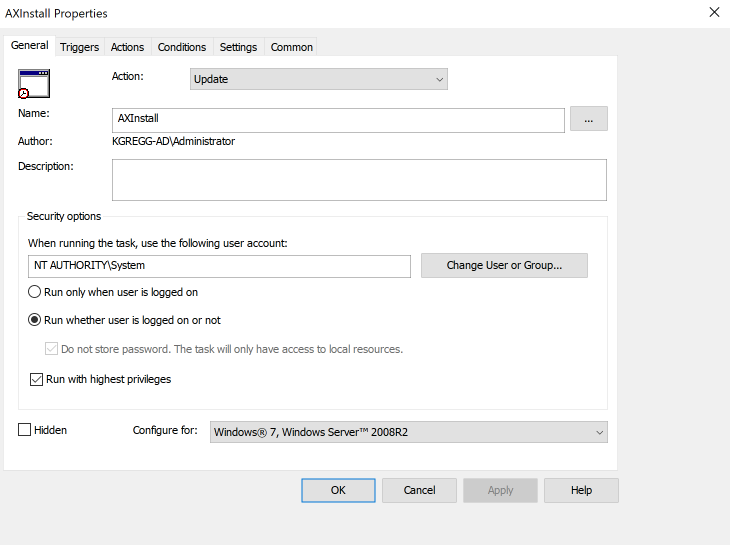
- Click the General tab, update the following:
- Select the Action: Replace
- Enter a name and optional description.
- Set the user account to
NT AUTHORITY\System - Run whether logged in or not and with the highest privileges.
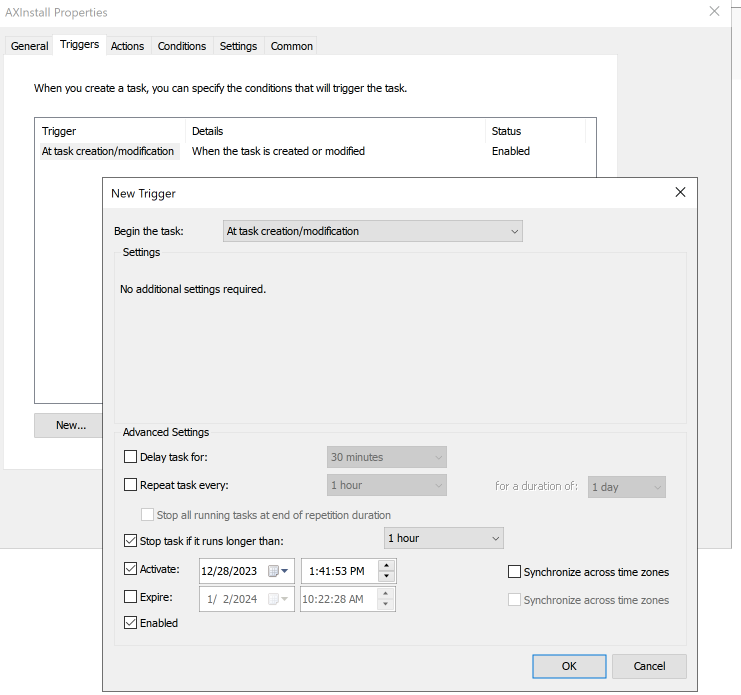
- Click the Triggers tab, start a new trigger and set the following:
- Begin the task: At task creation/modification
- Clear the checkbox Delay task for:
- Select Stop task if it runs longer than: and set to 1 hour
- Set the preferred activate time and select the checkbox
- Set to Enabled
- Click the Actions tab and start a program with these settings:
- Program/script:
C:\Windows\System32\WindowsPowerShell\v1.0\powershell.exe - Add arguments (with quotes):
"C:\Windows\Temp\Install-AXAgentMSI.ps1" "-AccessKey YOUR_AUTOMOX_KEY"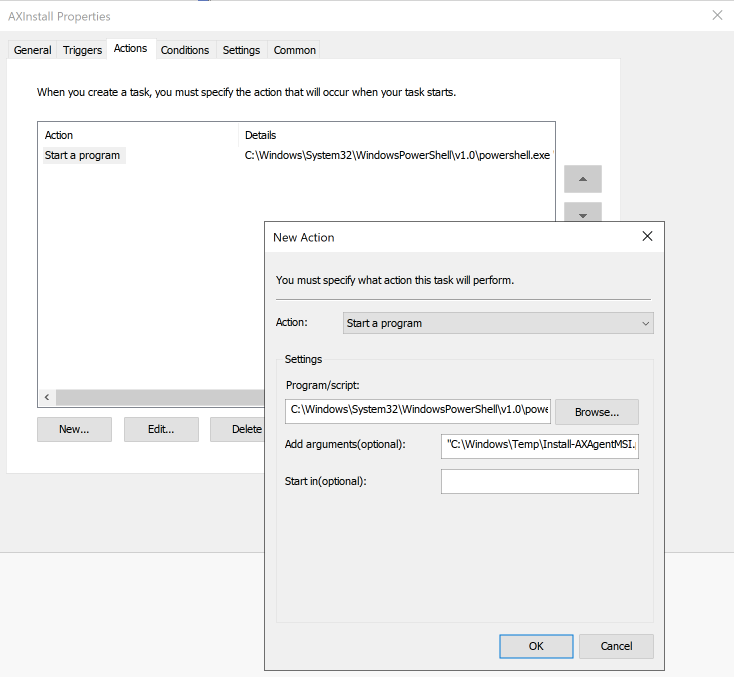
- Your Automox access key is in your console under Devices → Add Devices.
- Program/script:
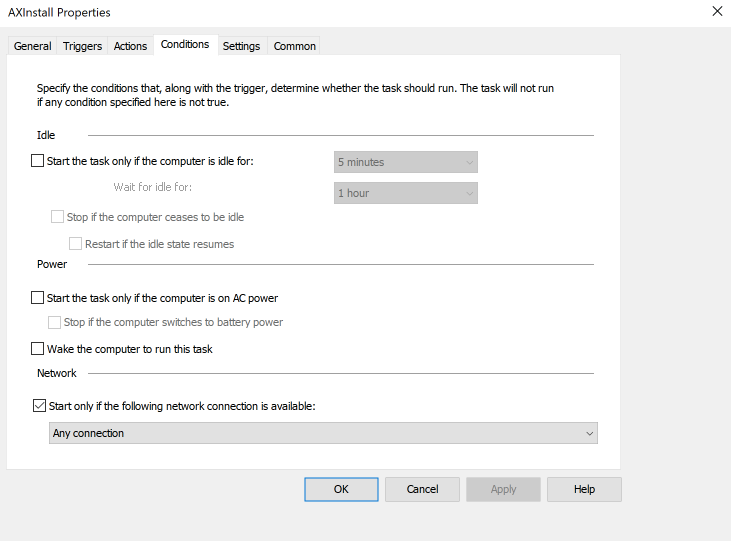
- Click the Conditions tab.
- Select Start only if the following network connection is available: Any connection
- Select Start only if the following network connection is available: Any connection
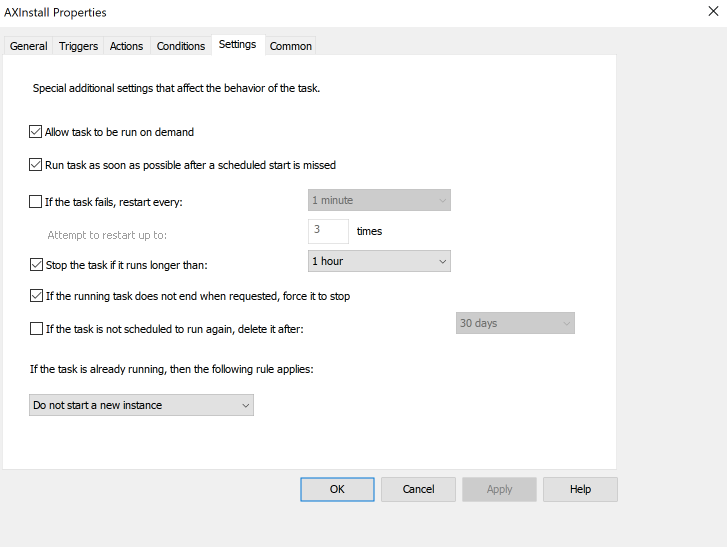
- Click the Settings tab and select the following:
- Stop the task if it runs longer than: 1 hour
- If the running task does not end when requested, force it to stop.
- If the task is already running, then the following rule applies: Do not start a new instance.
- Click the Common tab and select the following:
- Remove the item when it is no longer applied.
- Item-level targeting → click Targeting
- In the Targeting Editor, click New Item → File Match.
- For Match type, select File exists
- In the Path field enter:
C:\Windows\Temp\Install-AXAgentMSI.ps1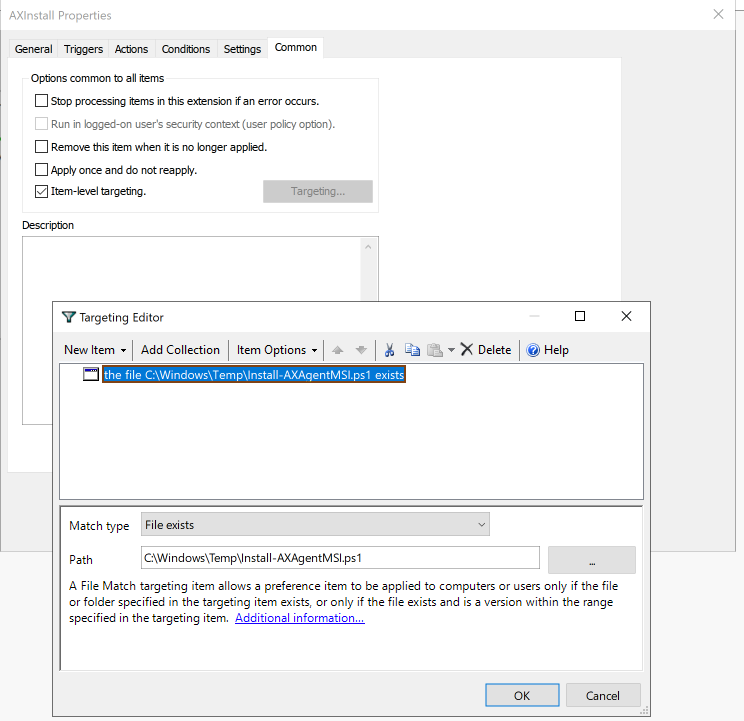
- After these values are set, assign the GPO to your desired audience.
Additional Group Handling
If you need to add devices that are deployed with the GPO policy to a specific Group in Automox, you can amend the arguments in Step 6 with the following:
C:\Windows\Temp\Install-AXAgentMSI.ps1" "-AccessKey YOUR_AUTOMOX_KEY" "-GroupName 'My Group Name'" "-ParentGroupName 'My Parent Group Name'ParentGroupName is only required if the target Group is a child Group in the Automox Console.