Embedding Your Access Key into the Automox MSI
To deploy the agent![]() Lightweight client application, which is installed on managed devices. without parameters, modify the Automox MSI installer directly to include your access key. This key ensures that the device
Lightweight client application, which is installed on managed devices. without parameters, modify the Automox MSI installer directly to include your access key. This key ensures that the device![]() A subset of Assets, a general term denoting anything that runs the Automox Agent and is registered with the system. appears in your management console.
A subset of Assets, a general term denoting anything that runs the Automox Agent and is registered with the system. appears in your management console.
The simplest way to embed the access key is by using Microsoft's MSI editing tool, Orca. You can download Orca as part of the Windows Installer SDK from the link below:
Windows Installer SDK ISO Download
While other MSI editing tools are available, Orca is free and provided by Microsoft, making it the preferred choice for this procedure.
Editing the MSI with Orca
To edit the MSI file with Orca, follow these steps.
- Install and launch Orca.
- Click File → Open...
- The MSI file is loaded into the editor.
- Retrieve your access key from the Automox console
 Our web-based management dashboard, available at https://console.automox.com..
- Sign into the Automox console.
- Go to Settings → Secrets & Keysand copy from the Agent Access Key field.
- In the Orca editor, click Property from the Tables list.
- To add the access key you copied, double-click the first empty cell in the Property column to add a new entry.
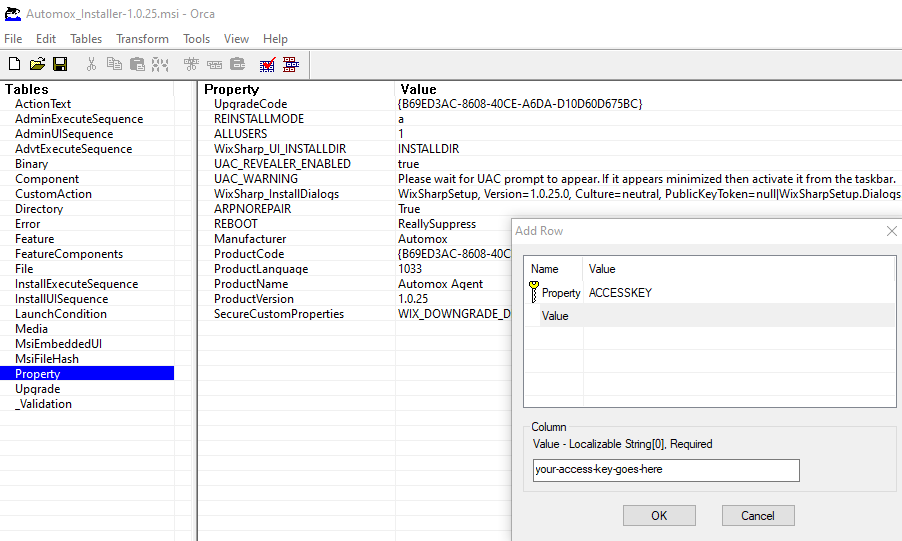
- In the Property field, type ACCESSKEY and press Enter. This is case-sensitive. The field will change from Property to Value.
- In the Value field, paste the access key and click OK. You'll see a new row with your new property and value entries.
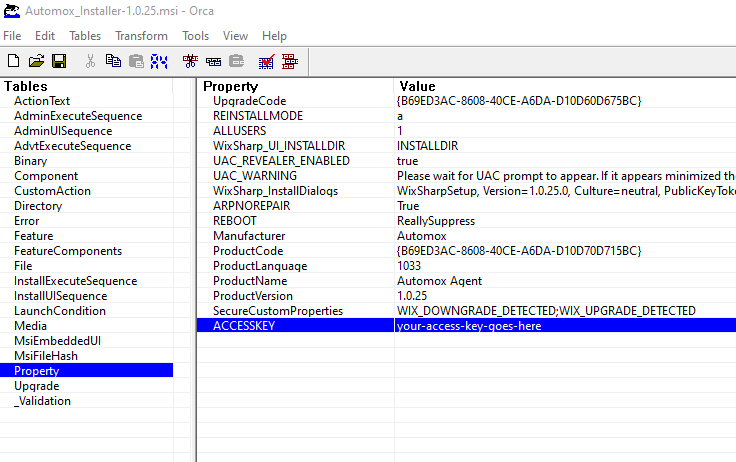
- Confirm that your access key is correct.
- Save the file (Click File → Save). You can now deploy this modified MSI without being prompted for a key.
This applies to both Silent and GUI-based installations.
- Open Orca.
- Click Tools → Options
- Select the Database tab.
- Enable the checkbox for Copy Embedded Streams During Save As
- Click OK to apply the setting.
- You can then use the Save As option for the modified installer.
