Security
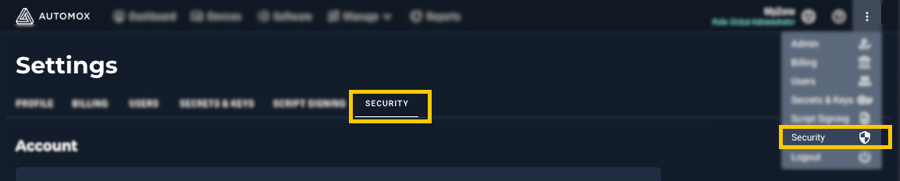
You can manage security-related tasks for accounts and organizations from the Settings → Security page.
Account
The account refers to the individual user account. From the Settings → Security tab, you can configure authentication for your account.
To access the account details, go to the Settings menu (⋮) in the console.
Two-factor Authentication: Email or Mobile
Email two-factor authentication (2FA) is enabled by default. When you log in to the Automox console using your email address and password, you will also need to enter the verification code sent to your email address.
You can select between email or mobile authentication from the Account → Two-factor Authentication section.
- When you select Mobile from the Two-factor Authentication section, the next time you log in to the Automox console using your email address and password, you will also need to enter the verification code from the mobile app you are using. See the next section for details about setting up authentication using a mobile method.
Enabling Mobile Two-factor Authentication
You can enable mobile two-factor authentication (2FA) using Google Authenticator, Authy, or other mobile app.
- Download a 2FA mobile app such as Google Authenticator or Authy.
- Install the app and open it.
- From the Automox console, go to Settings → Security and select Mobile from the Two-factor Authentication section.
- From the Mobile Two-factor Authentication window, you must scan the QR code with your mobile device to pair it with the Automox console.
- Enter the code that appears. Depending on the mobile app you are using, you might need to enter a second code.
Resetting mobile two-factor authentication
Organizations
Only Organization Administrators have permission to configure the following organization security settings:
- Login Attempt Settings
- SAML (single sign-on)
Login Attempt Settings
You can set the number of login attempts to the Automox platform that a user can make within a time frame before the account is locked.
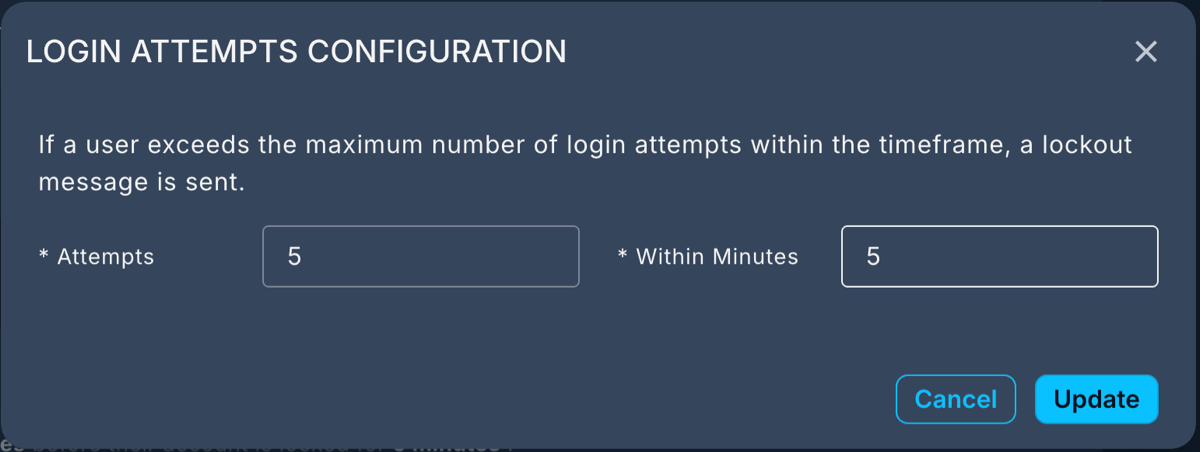
- Click Update to open the Login Attempts Configuration dialog box.
- You can set the following:
a. Enter the maximum number of login attempts a user can make within a set time frame.
b. Enter a time frame in minutes. If the user exceeds the allowed number of login attempts during this time frame, the account is locked. - Click Update.
In this example, the user can attempt to login 5 times within a time frame of 5 minutes. If the user exceeds the number of attempts within the 5-minute time frame, the account is locked.
For additional help, please submit a support request through the customer portal.
SAML-based Single Sign-on (SSO)
You can enable SAML-based single sign-on (SSO) for all your Automox users. Automox supports SAML-authentication through Microsoft Entra ID (Azure AD).
Security Assertion Markup Language (SAML) is a standard for exchanging authentication data between an identity provider and a service provider. With SAML, users can use corporate credentials at a single point of authentication. Automox has two types of authentication flows. Automox-to-IDP and IDP-to-Automox.
Automox-to-IDP
The Automox-to-IDP authentication flow allows users to provide their email address from the Automox console login page, and be redirected to their configured Identity Provider (IDP) for authentication before being redirected back to the Automox console as the expected user.
For Automox-to-IDP, follow these steps:
- From the Settings → Security tab in your Automox console, go to SAML.
- Click Enable.
- Enter the authentication code for your two-factor authentication (2FA) method.
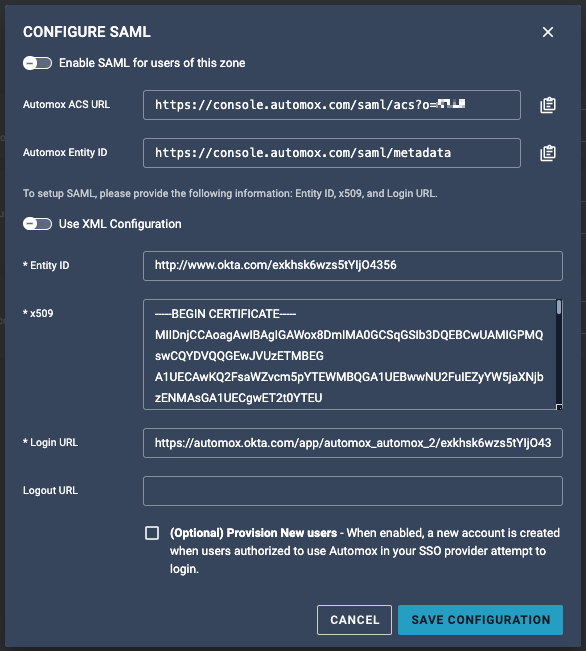
- In the Configure SAML window, enter the following information that is provided by your Identity Provider:
- Entity ID
- x509
- Login URL
- Click Save Configuration.
When you save the configuration, the 2FA method is disabled.
IDP-to-Automox
The IDP-to-Automox authentication flow allows users to log into the Automox console directly from their IDP dashboard. This is a common flow in organizations that use more than one SSO-enabled service.
For IDP-to-Automox, follow these steps:
- From the Settings → Security tab in your Automox console, go to SAML.
- Click Enable.
- Enter the authentication code for your two-factor authentication (2FA) method.
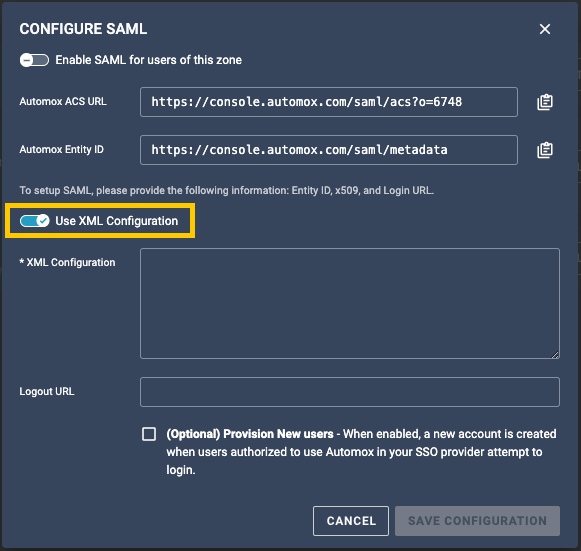
- In the Configure SAML window, switch on Use XML Configuration.
- Enter the XML Configuration information and click Save Configuration.
When you save the configuration, the 2FA method is disabled.
Disabling SAML
You can disable SAML-based single sign-on (SSO) for all your Automox users.
- From the Settings → Security tab, go to SAML.
- Click Disable.
